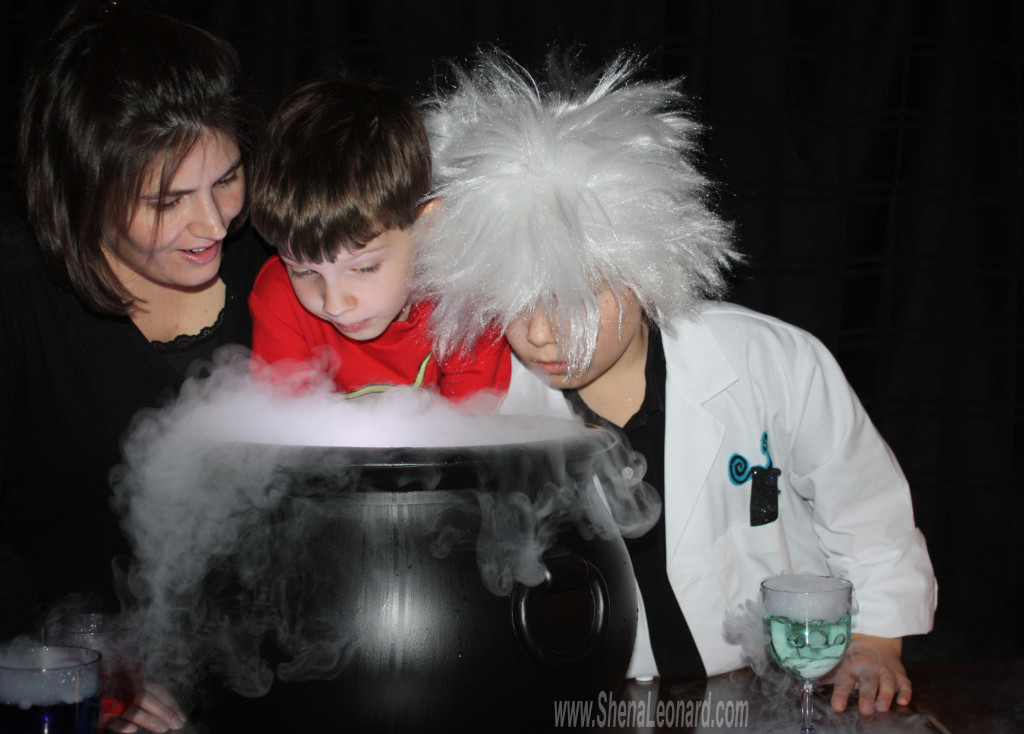
A few years ago we had some dry ice left over after one of the kid’s classroom Halloween parties. (Click here to see the Fun & Safe Witch’s Brew post) It just so happened that my oldest son was going as a Mad Scientist for Halloween that year too. So, I brought the extra dry ice home with me and we did a little impromptu photo shoot. I was so much FUN!
We even entered one of the pics into the Penguin Dry Ice Photo Contest and won $500. The boys and I split the money. They put their cut toward Lego Mindstorms (the Legos you use to build robots), and I probably put mine toward groceries or something fun like that… (=
Here are a couple of the pics we took that day. Scroll below the pics for a little “how-to” to set up your own Dry Ice Photo Shoot.
How we set up this shoot:
- The background is a black flat sheet that I pinned to the patio door curtains behind the kitchen table so it would hang down to the floor. It’s kind of wavy and crooked, but you can’t tell in the pics. (=
- We put a black tablecloth that we happened to have over the kitchen table and then set the plastic cauldron up on it.
- For the Dry Ice & fog, I set it up much like I do the Witch’s Brew for the classroom parties. I put a gallon ice cream bucket (full of water so it wouldn’t float) with the lid ON inside the cauldron. Then I put a bunch of dry ice around the bucket and dumped in some hot water to create the fog. Safety Notes: Do not touch the dry ice with bare skin, Use hot mitts and tongs. Leave the ice in a plastic bag and use a hammer or meat mallet to chunk it up in the bag. Do not ingest dry ice!
- You can reach into the fog with no harm – just DO NOT TOUCH OR INGEST the dry ice at the bottom of the cauldron. Reach in and dry off the ice cream bucket lid and place a light on top of it. We used one of those kid touch lights, similar to these, I believe ours was Buzz Lightyear. (= These touch lights work great because they sit on a flat surface and direct the light upward. You could also try flashlights standing in the ice cream bucket if you don’t have touch lights — I think it goes without saying that you would NOT want water in the ice cream bucket if you went that route. (=
- We used plastic goblets with water, food coloring and dry ice to make the smoking potions.
- Blow down into the fog to get it really rolling out of the cauldron and glasses before the pics.
- I just took the pics that I wasn’t in with my camera, but for the ones I was in with the kids we put the camera on a tripod and used the timer. You can even do this with an iphone now – prop it up and set the timer so you can get in the pic too. (=
That’s It! It was really a quite simple photo shoot to set up, and it was TONS OF FUN! We hope you get some fun Dry Ice pics too! If you try it, share the link so we can see them! (=
We got our dry ice at a local grocery store – it was a couple dollars a pound. You will need a Styrofoam cooler to keep it in, and you will want to buy it the day you want to use it. Check out this site for info on safety and where to buy www.dryiceideas.com
You might also like to see the Best Halloween Party Idea ever. (=



 At my "for pay" job I'm a Marketing Manager in the Yearbook industry - it's pretty fun as far as jobs go. But, what I REALLY like to do is spend time with my adorable boys - cooking, painting, creating, and making a mess. We thought it would be fun to share some of our favorite things on this blog. We hope you enjoy reading about our exploits, and maybe even take the time to try a few of them yourself. (=

I have noticed you don’t monetize your site, don’t waste your
traffic, you can earn additional bucks every month
because you’ve got hi quality content. If you want to know how to make extra $$$, search for: best adsense alternative Wrastain’s tools